Trying to figure out how to winterize your above ground pool?
Keep reading this post to learn how to close your above ground pool for the season.
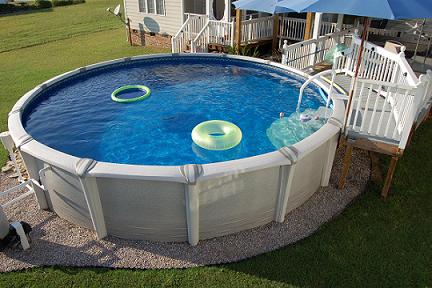
Once September rolls around, it tends to mean pool closing season for most people across America. If you’re using a pool heat pump or gas heater, you can probably relish two more months of comfortable swimming. But sooner or later, the temperature will drop to the point where the need to close your above ground pool becomes mandatory.
And when that happens, this post is all you need to get by.
Now for many, the thought of winterizing an above ground pool can sound like a monstrous task. But in reality, there’s a basic system you can use to winterize your above ground pool in less than a day. And in this post, we break the system into 7 simple steps.
So if you’re ready to learn how to winterize your above ground pool, then keep reading.
[Learn how to winterize your inground pool here]
How To Winterize Your Above Ground Pool In 7 Simple Steps
1.) Test and balance the water
First things first. Before doing anything else, it’s absolutely essential that you take the time to test and balance your water.
Why?
Because you really don’t want all your winterizing efforts to be in vain when you lift the cover a few months later to a green and cloudy pool. Which is why testing and balancing your water now is your safest bet.
So grab your pool test kit, and begin checking and adjusting each of the chemicals so that they’re in the following ranges:
- pH level: 7.4 – 7.6
- Alkalinity: 100 – 150 ppm
- Calcium Hardness: 200 – 275 ppm
- Chlorine: 3 ppm
- Cyanuric Acid (CYA): 60 – 80 ppm
[Learn more about balancing chemicals here]
Once you’ve balanced all the chemicals, you may want to shock the pool for good measure. This will give you water that extra boost of sanitizer needed to fight off any unexpected bacteria or contaminants.
2.) Clean the pool

Once you’ve cleaned house on a chemical level, it’s time to clean up the visual mess. Depending how often you keep up with pool maintenance, this step may take a few hours or no time at all.
Either way, cleaning your pool before closing it for the season is always a good idea. So let’s get to work!
First, grab your skimmer and fish out all of the surface debris like leaves and bugs.
Next, grab the pool brush and begin scrubbing your way across the walls. Take special care to put some elbow grease into all the hard to reach spots, like behind the ladders and stairs.
And of course, we saved the best for last: vacuuming.
For this, take a hose and connect it to your skimmer line, then connect that hose to the head of a pool vacuum. Next, attach a telescopic pole to the vacuum head, and begin making your way across the pool floor. It should be clean within a few passes, but just make sure to leave no unvacuumed.
[Here’s how to manually vacuum your pool]
3.) Add the winterizing chemicals
Now that you’ve balanced the water and cleaned the pool, it’s time to whip out the winter chemicals.
If you purchased a winter chemical kit, be sure to follow the included instructions. While some products can be added last, others may require that you run the pump and filter.
For the sake of simplicity, we recommend dropping a Winterpill into the water. These small, plastic spheres designed by Aquapill contain the perfect balance of chemicals needed to keep your water clean throughout the winter months.
It’s an easy way to automate pool maintenance, and it ensures that you’ll lift the cover to the same crystal clear water you saw when you closed it.
4.) Remove pool accessories and fittings
Start out by removing the bigger accessories like the ladder, steps, and floating chemical dispensers. Once those are out of the way, move on to smaller components of your pool system.
Once those are out of the way, move on to smaller components of your pool system. Then, remove your skimmer basket, but keep it nearby.
Last, remove any eyeball fittings attached to your return lines and place them in the skimmer basket.
Store the basket and other accessories in a safe, dry space.
5.) Lower the water level and plug up the lines
Skimmer
Now here is where you have some options.
The first way:
If you use a skimmer plug to cover up your pool skimmer entirely, then you don’t have to worry about draining the pool. Just make sure the skimmer plug is firmly attached. Once you’ve ensured that it’s secure, go ahead and drain the skimmer by disconnecting the hose at the bottom.
The other way:
Now, if you don’t use a skimmer plug, then you’ll have to drain a bit of water. Not too much, though. Aim for about 3-4 inches below the lower lip/opening of your skimmer.
Once you’ve drained the water, go ahead and disconnect the skimmer hose and let it drain. If your setup uses hard PVC pipes instead of flexible hosing, then blow out the water to waste. After that, plug the skimmer line
Returns
With the eyeball fittings removed, grab a threaded plug, and use it to safely plug the return line. Once the plug is secured, unscrew the return line hosing.
6.) Winterize your filter, pump, and pool heater
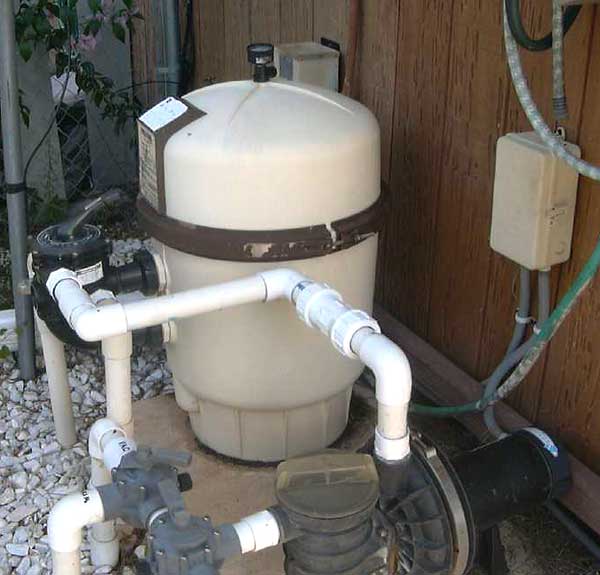
How to winterize a pool filter
If you’re trying to winterize an above ground pool with a sand filter, then the first step is walking over to your multiport valve and set it to “Winterize”, or any equivalent setting that allows the filter to drain. After that, simply remove the plug at the bottom of the filter.
For cartridge filters, remove the drain plug, take out and rinse off the filter cartridges, and store them indoors.
And if you use a DE filter, the procedure is the same. Remove the drain plugs, rinse off the filter grids, and keep the valves open
How to winterize a pool pump
Depending on what type of pump you’re using, you may have 1 or 2 drain plugs. Either way, remove all of them and allow the pump to drain. Then remove the pump basket, and unscrew and hose/pipes leading to the pump.
This is also a good time to remove any chlorinating equipment.
Aim to store your equipment somewhere warm and dry, indoors.
How to winterize a pool heater
Look for the drain plugs at the bottom of the heater, remove them, and allow the heater to drain. Once drained, unscrew any hosing/pipes connected to the unit.
Note: This is also a good time to inspect your equipment for any worn down O-rings or sealants. Replacing them is much easier when your pool is closed.
7.) Cover the pool
Home stretch, you’re almost done.
The last, and probably the most pleasant part of winterizing your pool is putting on the cover. But before you do that, we HIGHLY recommend doing one other thing:
Adding an air pillow.
An air pillow is a simple, inflatable sack that floats on the surface of your water just under your cover. It mainly serves to protect your pool walls and frame from freeze damage. With an air pillow, all of the pressure that would be put on your frame from ice and water buildup instead gets transferred to the air pillow.
Bottom line: you definitely want to add some type of air pillow under your cover. And when you, don’t worry if it floats a little off center. That’s okay.
With the air pillow in the water, grab your cover and drape it over the perimeter of your pool. Once the pool is covered, use water bags, winter cover clips, or a cable and winch to secure the cover around the rim. For extra security, you may want to use a combination of all three methods, depending on how brutal your winters get.
To keep your cover in good condition, you’ll also want to make sure you do a little water removal maintenance as the winter months go by. Whenever you see puddles starting to form on the surface of the cover, use a submersible pump or bucket to remove it and keep the cover dry.
Closing thoughts
Easier than you thought, huh?
So when you go and winterize your above ground pool, all you need to do is flip back to this post and follow the steps. And if you already did that, then congrats on a job well done.
As you know by now, closing an above ground pool is simple with the right approach. It really just calls for cleaning out the pool and making sure it has the “food” it needs to hibernate through the winter.
If you enjoyed reading this post, you might also like: